There is currently no text in this page. You can search for this page title in other pages, or search the related logs, but you do not have permission to create this page.
Category:How-To
Media in category "How-To"
The following 25 files are in this category, out of 25 total.
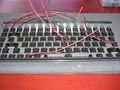
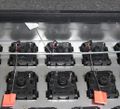
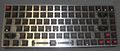 01-populated plate.JPG 1,652 × 708; 542 KB
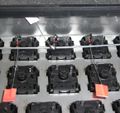
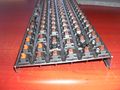 02-populated plate side view.JPG 1,824 × 1,368; 886 KB
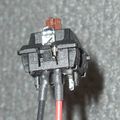
 03-populated plate close-up.JPG 1,482 × 1,012; 512 KB
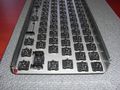 04-populated plate underneath.JPG 1,824 × 1,368; 935 KB
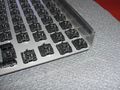 05-populated plate underneath close-up.JPG 1,824 × 1,368; 1,018 KB
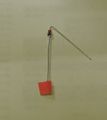
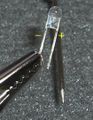 06-LED polarity.JPG 840 × 1,084; 283 KB
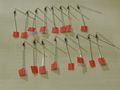
 07-switches, LEDs and wire.JPG 1,824 × 1,368; 1.14 MB
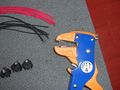 08-wire stripper.JPG 1,824 × 1,368; 993 KB
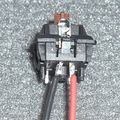 09-LED solder the leads.JPG 440 × 440; 158 KB
 10-LED add shrink-tubing.JPG 440 × 440; 111 KB
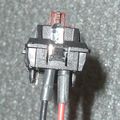
 11-LED ready to install.JPG 440 × 440; 102 KB
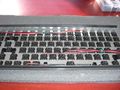
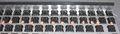
 12-LEDs installed.JPG 1,824 × 1,368; 969 KB
 13-LED leads tied.JPG 1,824 × 1,368; 930 KB
 14-Diodes positive flags.JPG 1,224 × 836; 561 KB
 15-Diodes one ready.JPG 542 × 608; 69 KB
 16-Diodes row ready.JPG 904 × 678; 150 KB
 17-Diodes one placed.JPG 1,218 × 1,056; 442 KB
 18-Diodes row placed.JPG 1,804 × 508; 415 KB
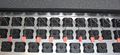 19-Diodes row soldered.JPG 1,820 × 832; 671 KB
 20-Diodes row neg trimmed.JPG 1,798 × 702; 548 KB
 21-Length of 18g wire.JPG 1,660 × 190; 77 KB
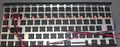
 22-Pos row placed.JPG 1,822 × 768; 532 KB
 23-Diode pos pin bent.JPG 1,032 × 934; 350 KB
 24-Diode pos pin soldered.JPG 1,160 × 1,088; 425 KB
 Hard-Wired Keyboard Rail.JPG 803 × 110; 76 KB


